Avatar Na'vi Makeup
Tutorial by Josh at Toxicimage.com exclusively for FX Warehouse. This is an exclusive and any copying of this tutorial to another website or use will be persecuted by law.
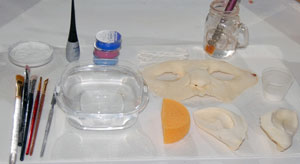
Materials Used:
Diplayed here we have all the materials needed to apply our Na'vi inspired make-up with the exception of 2 foam wedges. One for glue and one for powder. We used Translucent Powder, silver 'Detailz' make-up, aquacolor (in light blue, dark blue and pink), jar of 99% Isopropyl Alcohol, glue brush, various sizes of brushes, dish of water, sponge for aquacolor, the prosthetics (face and ears) and pro adhesive.
It is a good idea to wipe the skin down with soap and water to remove any oils. If you have witch hazel it works well also.
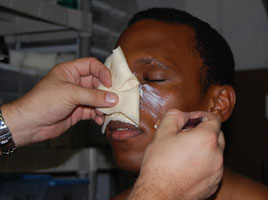
Center the piece on the face and secure it with an even coat of pro adhesive in just that area. Some people pat baby powder around the edge to create an outline before gluing it to help with placement.
Once the center is secured, peel the unglued portion back to where the glue stopped and add some more. Press the prosthetic back down into the glue. Repeat until the whole appliance is glued down.
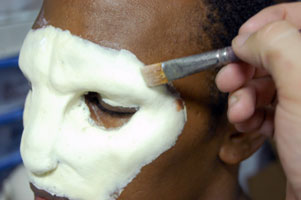
Once the whole prosthetic is glued down, go over the edges with more adhesive to make sure they are all even and stuck down well.
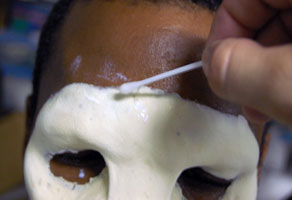
Any problem areas can be fixed using a Q-tip dipped in alcohol. This will release the adhesive and allow you to reposition a very small area again, or roll out any folds or wrinkles in the foam.
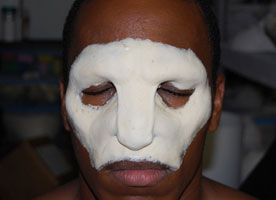
Now the face is totally applied.
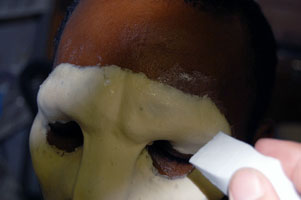
Using the sponge wedge, dab adhesive over the whole prosthetic, this will seal it and prevent the make-up soaking into it.
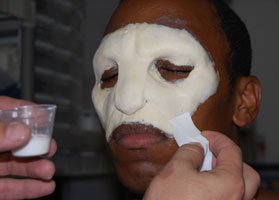
Make sure you work with the adhesive in an outward fashion to avoid ruining your edge or dab in a stipple manner.
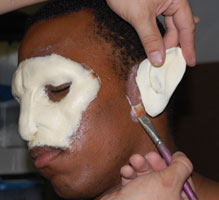
Apply the ears using the adhesive and then cover the prosthetic with the adhesive as you did with the face. Be very careful, as they will be sticky and you can glue the piece to itself easily, and this is a very strong adhesive.
I start with the outside of the ear and then to the inside last to avoid accidentally pressing the overhanging piece into itself.
If you do stick the prosthetic to itself, then use alcohol on a Q-tip to release it. This is also something to watch around the nose area.
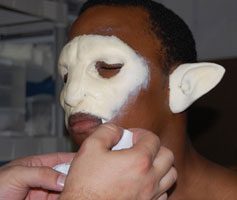
Once your adhesive is dry, use a foam wedge to apply powder to the adhesive to set and get ride of stickiness. Again, this time do under the nose and inside the ears first to avoid them being stuck down.
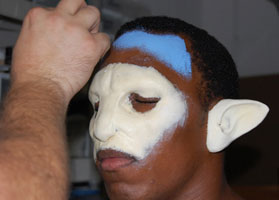
Now add the light blue aquacolor with a damp sponge. This is a water activated makeup. If you see streaks then you're using too much water. Aquacolors are highly pigmented and don't need a lot of water to activate them. I like to use a stipple technique to avoid streaks and it also creates a cool skinlike texture.
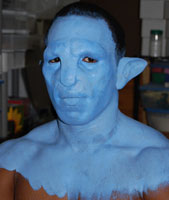
Cover the whole area that will be seen. For the purpose of this tutorial we have stopped at the chest. If this was for an actual event and the model was not wearing a blue body suite, the whole back, stomach, etc. would be done along with arms and possibly legs.
Aquacolors stay on very well without smudging. You might want to get a sealer, such as Kryolan's Fixier Spray, or Green Marble SeLr to keep the makeup on for hours. Aquacolors wash off with soap and water. If using a sealer then it takes a bit more scrubbing to remove.
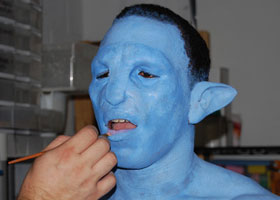
Apply the pink to the inside of the lip and blend it out so it fades to the blue. This can be done with either a clean brush or clean finger tip.
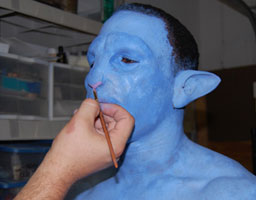
Add the pink also into the area marked on the tip of the nose.
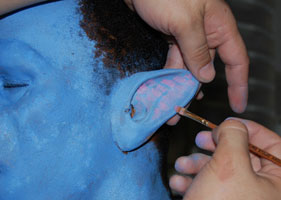
Add the pink into the inside of the ears in a radiating pattern that fades as it reaches the edge of the ear.
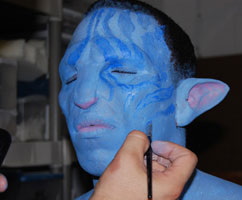
Now, using the darker blue begin to add the stripe pattern to the face. I recommend the use of reference material for this part.
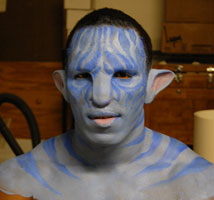
Bring the dark blue design all the way down as far as you need to, in our case down to the chest.

Take the 'Detailz' silver makeup and using the fine tip applicator, add the silver dots to the face and cheeks.
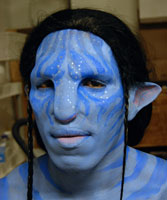
Add the wig with a couple of braids or whatever you like to finish the look.
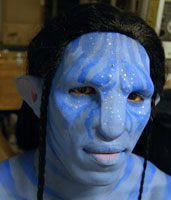
Here's the finished makeup.
Tutorial by Josh at Toxicimage.com exclusively for FX Warehouse. This is an exclusive and any copying of this tutorial to another website or use will be persecuted by law.
Disclaimer: FX Warehouse Inc. will not be responsible for use of misuse of any products you may buy or use from us. Most of our products are for Professional Use only. Use at your own risk.
